 Blog Home
สวัสดีครับเพื่อน ๆ ชาว IT กลับมาพบกันอีกครั้งกับ Cloud HM Blog ข่าวสาร และบทความ IT น่าอ่านพร้อมบริการทุก ๆ ท่านนะครับ
Routing and Remote Access Service (RRAS) คือ Role หนึ่งที่มาพร้อมกับ Windows Server ตัวช่วยในการทำหน้าที่บริการการกำหนดเส้นทางและการเข้าถึงระยะไกลเปรียบเสมือนเราเตอร์ซอฟต์แวร์ Microsoft API ที่จะช่วยให้ใช้การเชื่อมต่อ VPN เพื่อให้ผู้ใช้ปลายทางสามารถเข้าถึงเครือข่ายขององค์กรได้จากระยะไกลได้ และไม่เท่านั้นยังสามารถนำไปใช้ในการทำ VPN Site to Site , Dial-up ( PPPoE ) , NAT, Web Application Proxy , Lan routing และยังสามารถทำ VPN ใน feature BGP ได้ด้วยใน Windows Server 2012 R2 แต่โดยปรกติWindows จะมีแถมมาให้ยังทางผู้ดูแลต้องไป Enable Role Remote Access และใน Role ดังกล่าวจะมี Service DirectAccess and VPN(RAS) , Routing , Web Application Proxy.
วันนี้ทาง Cloud HM ขอแนะนำ Role ที่น่าสนใจ ซึ่งอยู่ใน Windows Server สามารถทำอะไรได้นั้นเรามาทำความรู้จักกันก่อนเลย.
เมื่อเรารู้จัก Routing and Remote Access Service (RRAS) กันแล้ว เรามาจำลองสถานการณ์การใช้งาน Service : VPN and Routing ใน RRAS กันดีกว่า
Scenario:
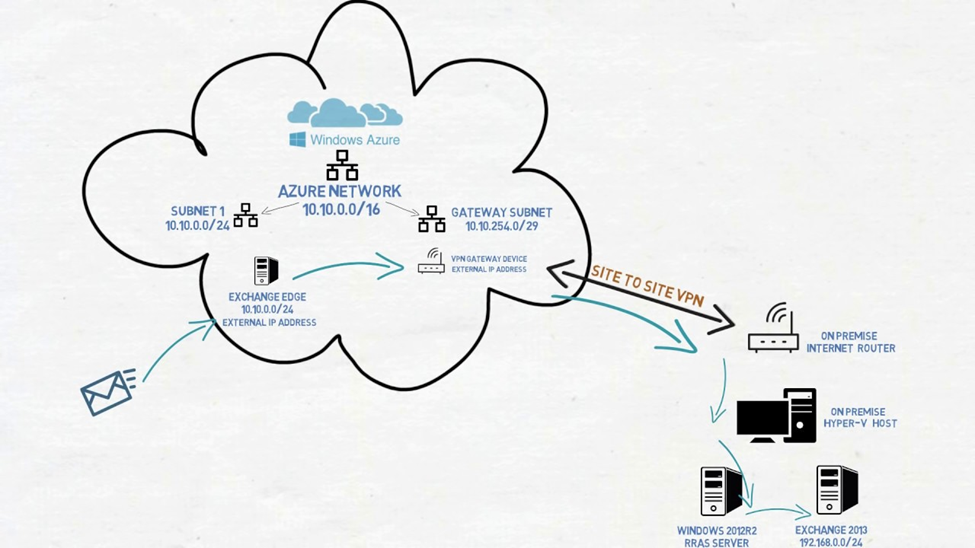
ต้องการทดสอบ Site to Site VPN โดยการเชื่อม VPN ไปยัง Public cloud คือ Microsoft Azure แต่เนื่องจากการจำลองครั้งนี้เป็นการจำลองจากที่บ้านโดยไม่มี Firewall หรือ Router Gateway ที่มี Service Site to Site VPN ได้ มีเพียง Home Internet, router ที่มากับผู้ให้บริการ และ มีเครื่องคอมพิวเตอร์เพียง 1 เครื่อง แต่มีการจำลอง Hyper-V เรียบร้อยแล้ว
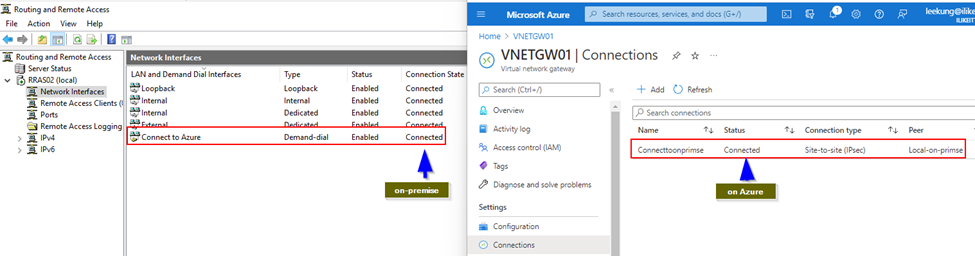
การจำลองครั้งนี้ สำหรับบน On-premise เราจะใช้ Service VPN and Routing ใน RRAS โดยการเชื่อมต่อ Site to Site VPN ไม่ยัง Azure และ Client on-premise สามารถเข้าถึงและใช้งาน resource ที่อยู่ Azure ได้ในรูปแบบ Hybrid ตามรูปภาพด้านล่าง
สิ่งที่ต้องเตรียม
On-premise
- Forward port UDP:4500 และ UDP: 500 ให้ชี้ไปยังเครื่องที่ถือ Role RRAS อยู่
- ตรวจสอบจากผู้ให้บริการว่า IP Address ของเราทางผู้ให้บริการอินเตอร์เน็ตทำ NAT ไว้หรือไม่?
หากผู้ให้บริการทำ NAT อยู่ให้ทางผู้ให้บริการปลดจากการทำ NAT หลังจากนั้นจะได้ IP จริง แต่ได้ในรูปแบบ Dynamic หากใช้ในทดสอบใช้ IP Dynamic ก็เพียงไม่ต้องซื้อ Fix IP แต่หากใช้งานจริงควรใช้รูปแบบ Fix IP - VM ที่ทำหน้าที่เป็น RRAS Server และ Enable Role Routing and Remote Access Service (RRAS)
Azure
- Create a Virtual Network Gateway
- Local Network Gateway
ขั้นตอนเปิดการใช้งาน Role Routing and Remote Access Service (RRAS)
- Server Manager > Add roles and features >
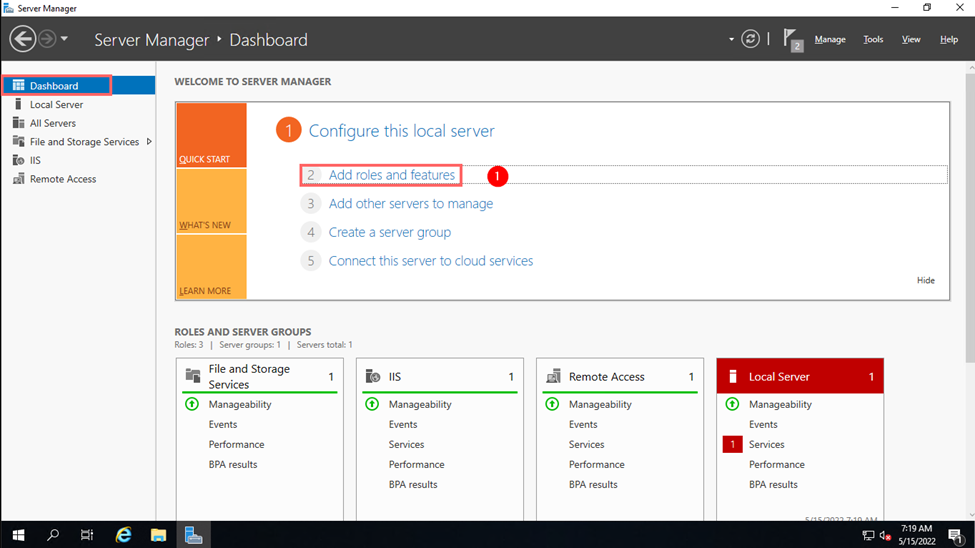
2. เลือก เมนู Server Roles > เลือก Roles : Remote Access
3. Next
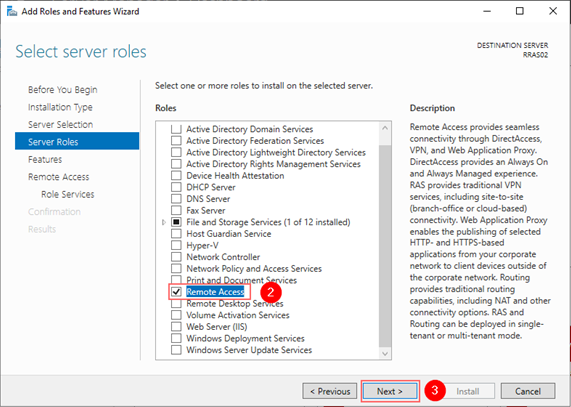
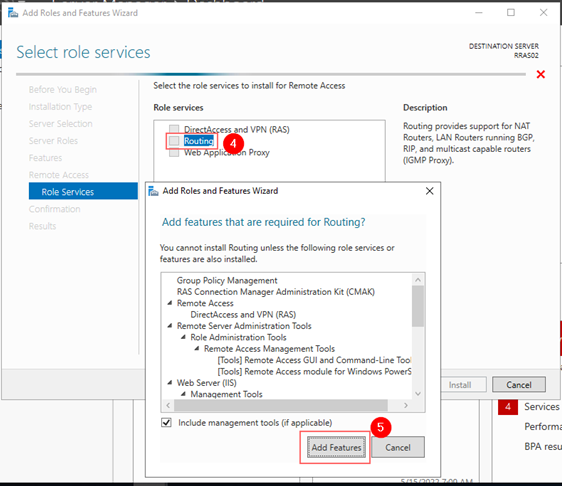
4. เลือก Routing
5. Add Features
6. Next

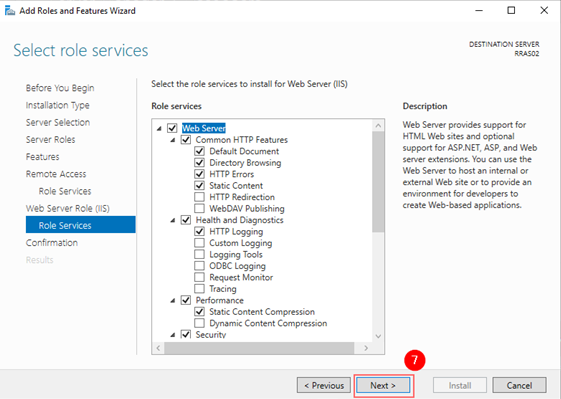
7. Next
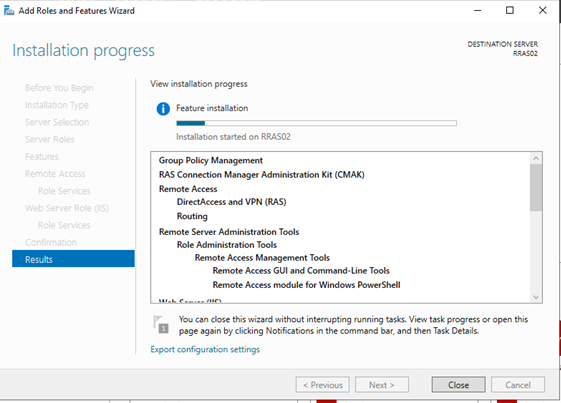
รอจนเสร็จสิ้น การเปิดฟีเจอร์ RRAS ก็เสร็จสมบูรณ์
ขั้นตอนเซ็ตค่าเพื่อเชื่อมต่อ VPN ไปยัง Public Cloud (Azure)
สิ่งที่ต้องทราบก่อนเชื่อมต่อ
- Public IP ของ Azure Virtual Gateway
- Private IP ของฝั่ง Azure
- ต้องทราบ หรือกำหนด Shared key (PSK) ให้ใช้งานร่วมกัน
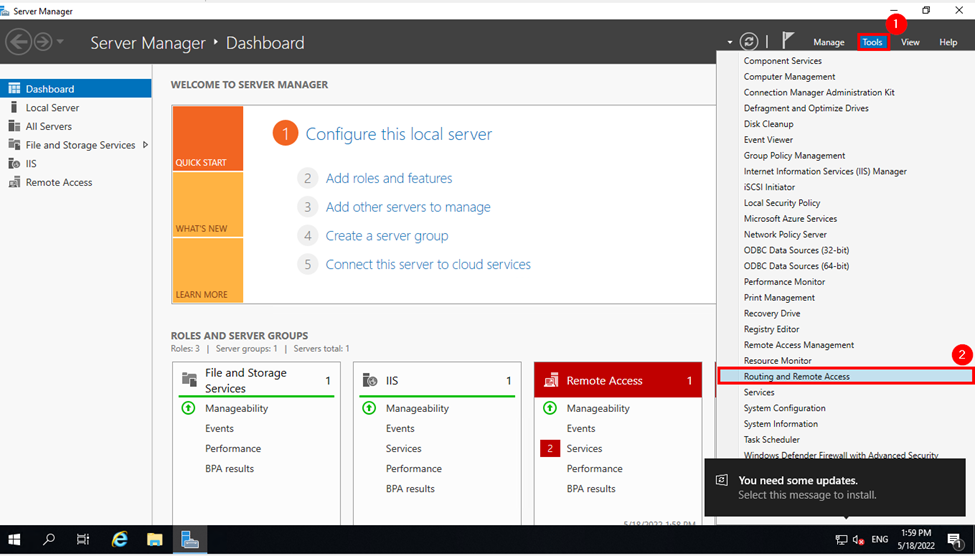
- Server Manager > Tools
- เลือก Routing and Remote Access
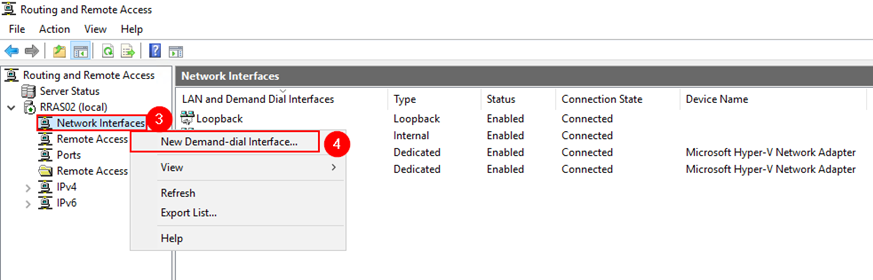
3. คลิ๊กขวาตรง Network Interfaces
4. เลือก New Demand-dial Interface
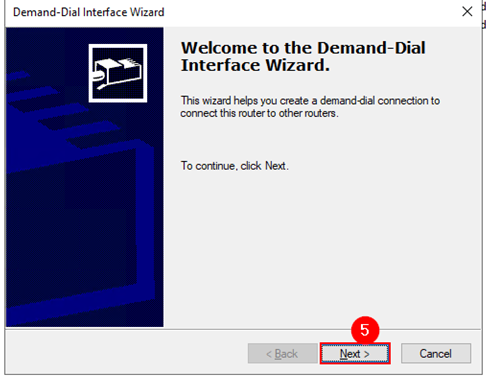
5. Next
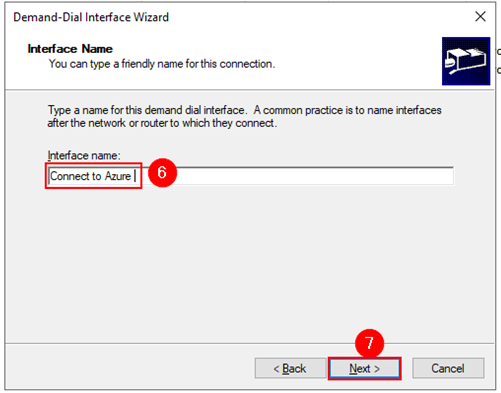
6. ตั้งชื่อ Interface สำหรับเชื่อมต่อ VPN
7. Next
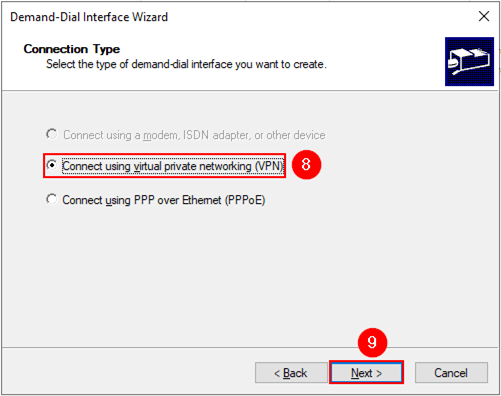
8. Connect using virtual private network (VPN)
9. Next
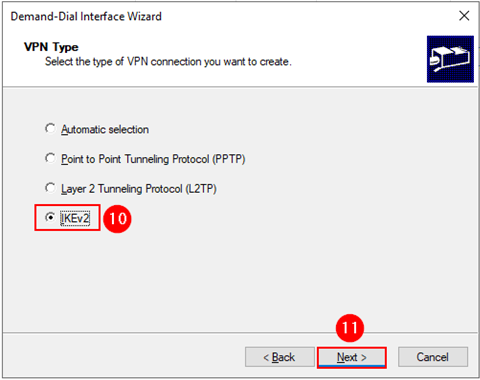
10. เลือก IKEv2
11. Next
12. หมายเลข Public IP ของ Azure ที่จะไปเชื่อมต่อ
13. Next
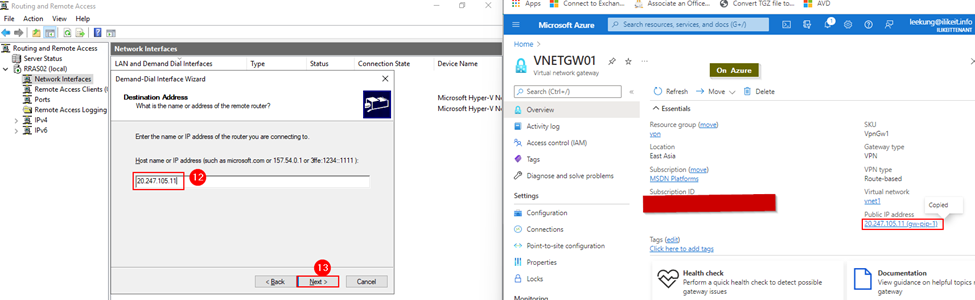
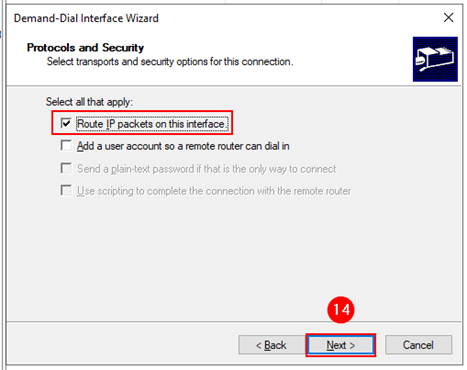
14. Next
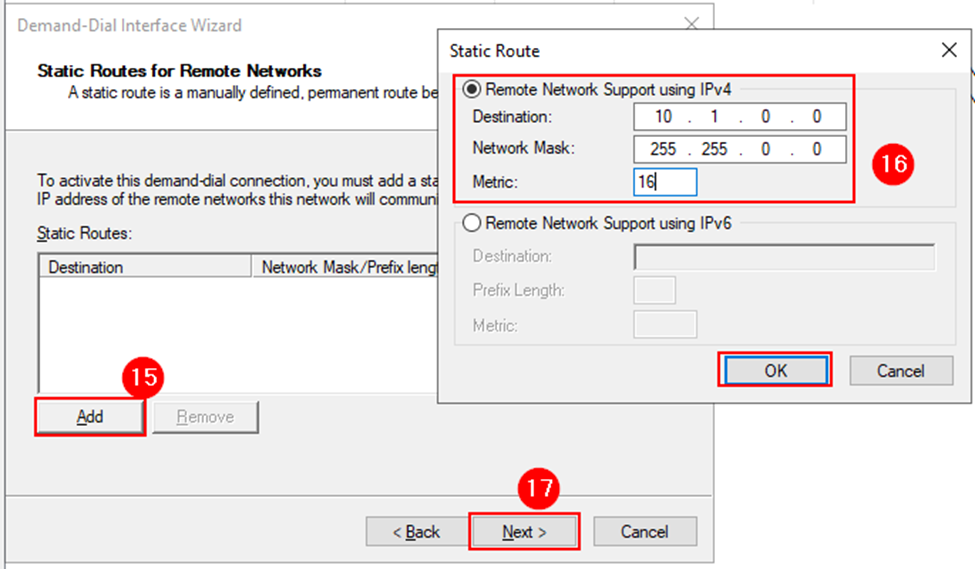
15. เลือก Add เพื่อเพิ่มในส่วน Private IP ในฝั่งของ Azure
16. Private IP Rang ของฝั่ง Azure
17. เลือก OK เพื่อดำเนินการต่อ
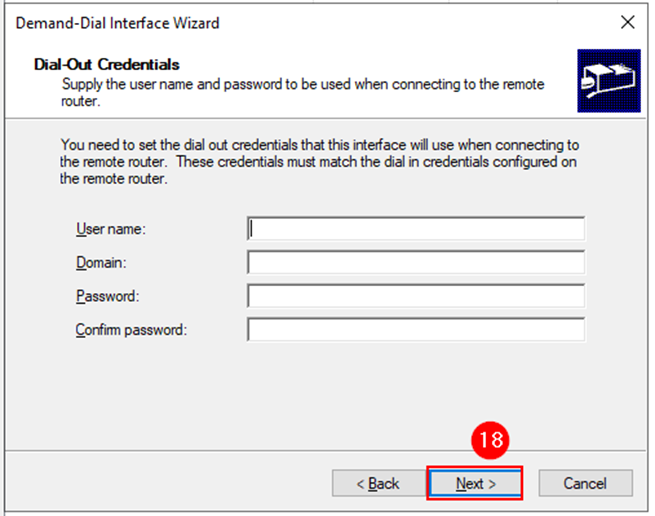
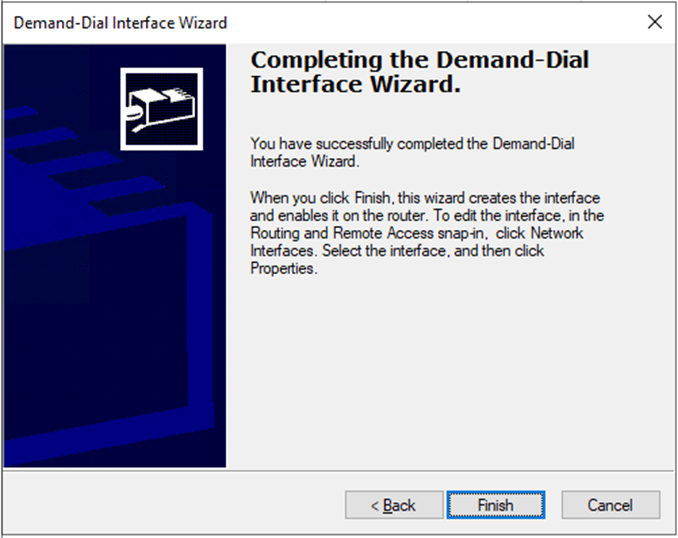
18. ไม่ต้อใส่ข้อมูลใด ๆ กด Next เพื่อดำเนินการต่อ
เสร็จสิ้นในการสร้างการเชื่อมต่อไปยัง Azure
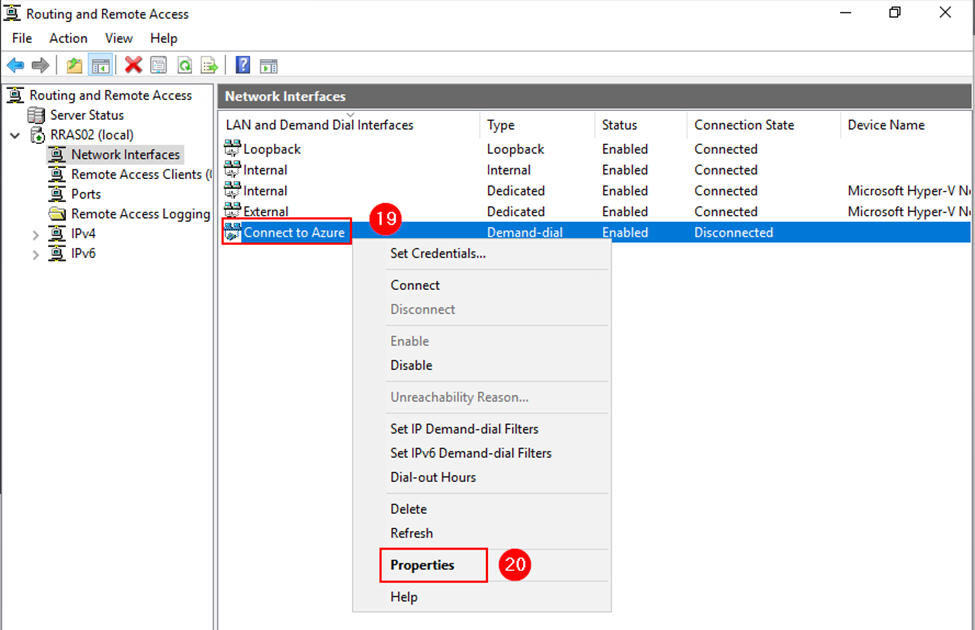
19. เลือก Connection ไปยัง Azure ที่ได้สร้างไว้ แล้วคลิ๊กขวา
20. เลือก Properties
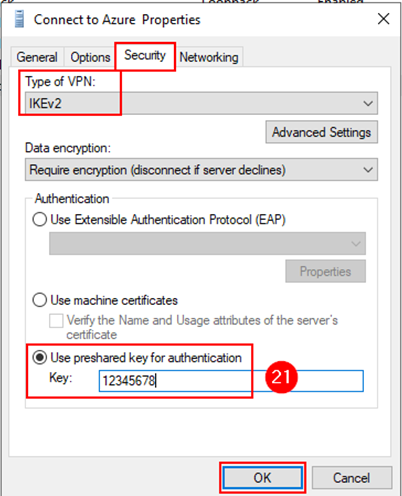
21. เลือก Tap: Security > Type of VPN : IKEv2 > เลือก Checkbox : Use preshared key for authentication แล้วใส่เลข Preshared key ให้ตรงกับฝั่ง Azure
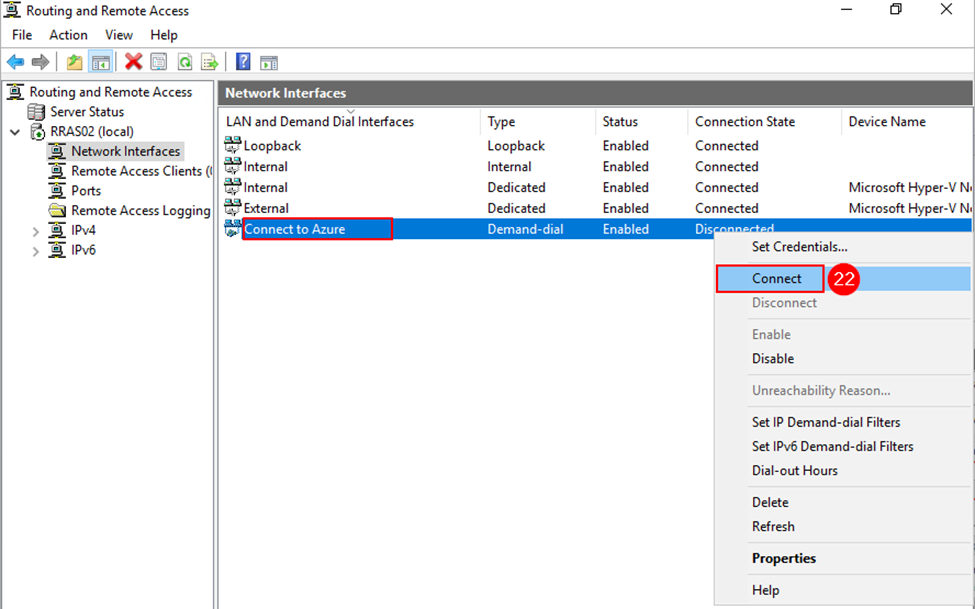
22. คลิ๊กขวาตรง Connection ที่เชื่อมไปที่ Azure แล้วเลือก Connect (ในส่วนนี้หากฝั่ง Azure ยังไม่สร้าง Connect มาที่ on-premise ให้ทาง Azure สร้าง Connection เพื่อเชื่อมต่อมาที่ on-premise ต้องสร้างทั้งสองฝั่ง)
ผลการเชื่อมต่อ สถานะ Connected ทั้งฝั่ง On-premise และ ฝั่ง Azure
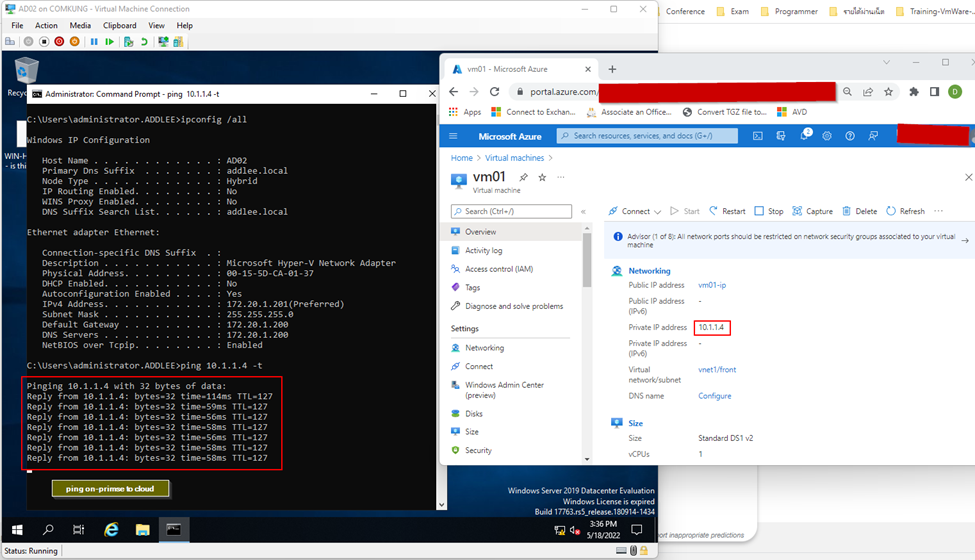
ทดสอบ ping เครื่องบน Azure โดยใช้ Private IP ของเครื่องบน Azure
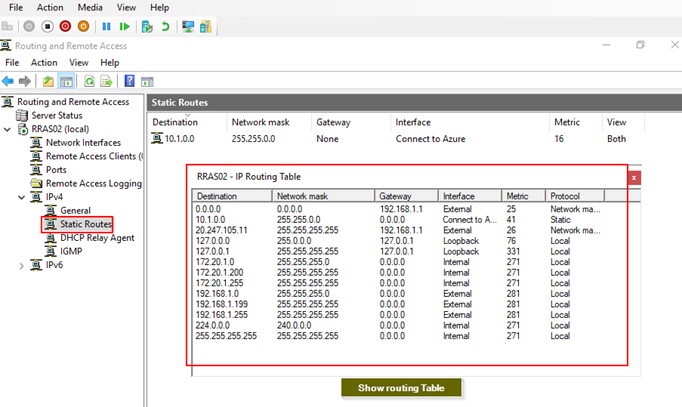
ข้อมูลการ Routing บนเครื่อง RRAS โดยจะแสดง Routing table
ในส่วนนี้เป็นการทดสอบบางฟีเจอร์ของ RRAS โดยทดสอบ VPN ไปยัง Azure แต่ฟีเจอร์ของ RRAS ทำได้อีกมากมายตามที่ได้กล่าวข้าวต้นเช่น ทำ NAT ให้เครื่องลูก ออก internet ผ่านการ NAT หรือ ทดสอบ Dial Internet โดยใช้ PPPoE สามารถต่อสายตรงและ Create PPPoE เพื่อเชื่อมต่อโดยตรง หรือทดสอบการเชื่อมต่อได้ด้วย
ขอบคุณที่รับชมและอ่านบทความนี้หวังว่าจะเป็นประโยชน์ไม่มากก็น้อย หากผิดพลาดประการใดขออภัยมา ณ ที่นี่ด้วยครับ
อ้างอิงข้อมูล
— Cloud HM